Apex Competition's 996 Carrera 2 Project Car

So what's this all about? It's about the impressive Porsche GT3 Cup cars that we can't drive everyday... so why not take an affordable 996 C2 and modify it to arrive at a semi-comfortable yet formidable weekend club sport toy... One that can still be driven to and from the circuit and even everyday!

Tuesday, July 8, 2008

Updating the Headlights

The amber turn signals were delivered on the earliest Bosters & 996 cars. Personally I dont like them at all. I like the new 997 headlights as they look more "classic 911" however this is a 996 so we're stuck with what we have. What we can do however is swap out these old faded yellowing headlights for a nice new set of clear lights with smoked turn signals and get rid of the amber. The smoked lights will look much better on our project car's White/Black color scheme.


How to install 996 Headlights.

It is really simple but I have heard all sorts of stories from people who did no research prior to attempting this and wound up breaking their lights. There are no screws or nuts to remove. You need to use Porsche's special tool that is included in the tool kit in each car.

First locate the plastic interior nut holding the carpet in place. After you remove the plastic finishing screw you will be able to pull down the carpet. Remove the rubber plug just to the right of the grounding wire to expose the headlight removal socket. In your Porsche Tool kit you will find a hollow 'hex' wrench with a handle. Insert the hex head into the socket as show with the handle hanging down.

Turn the handle counter-clockwise until you hear a "click" and see the headlight move out forward. You can then pull the headlight straight forward out of the car. It is located by plastic guide pins in a plastic channel. Assembly is simply the reverse procedure.


Wednesday, July 2, 2008

More Sparkle :)

I was lucky enough to find that "The Racer's Group" had just posted a set of the later model tail lights on their website. Something they had taken off a 996 shell for conversion into one of their full on race cars no doubt. It gives the rear of the car a nice updated look. The main difference is the replacement of the amber lense across the top with the newer clear/smoked lense.


Tuesday, June 24, 2008

Track Day #2 (w/ video)

Monday, Project 996 was back on track as ACS owner Bill Sulouff was instructing at the BeaverRun Motorsport complex. The corner weighting, pressure adjustments and the ride height adjustments which were carried out last week all made a positive improvement on the 996's handling. The cars seems to be handling about right now for a basically stock 996.

After a few sessions it became clear that in order to enhance the track handling of this car any further that some additional "balance" adjustments would be required. The car was being pushed hard enough now that we could tell it still had too much understeer coming out of the corners. Even when "tossed" a bit and accelerating hard there was some "push". Therefore it looks like some GT3 swaybars (or similar) are in the car's near future.

The Hawk HP Plus pads that we intalled were a definite improvement. The fade is mostly gone. However we still seem to getting some fade at the end of the longer straight as we brake hard for the hairpin. It's possible that this is related to something else so we'll be going through the front brake system before the next event.

Here is a video of a couple laps. Fabspeed muffler bypass "Track Pipes" were installed just for this one day. Unfortunately they are far too loud for everyday use :)

http://www.youtube.com/watch?v=p-qjbPflQ7o

Sunday, June 22, 2008

Track Prep 101

Monday is another track day at BeaveRun where Bill will be instructing so we spent a little time on the 996 this weekend attending to some things that were still not optimal. First off the brake pads that had been on the car for the first track day proved to be insufficient, fading after only about 4 hard laps. So we will be testing various compounds to see what works as advertised! First up is a set of Hawk HP Plus pads which are Hawk's Autocross and "Track Day" pads. Designed to be driven to and from the track and still perform well in normal street driving, these pads sound like they will be what we're looking for if they perform.


Next on the agenda was getting the ride height and corner weights squared away. Given that this is the '996 to GT3 Project' we started out by setting the ride heights to roughly what is delivered on a Porsche GT3. 25.5" from the highest point of the wheel arches to the ground (tire contact patch).

After this was done we pulled the 996 onto our setup scales to check the corner weights. Way off! After a few hours of tweaking the H&R coil overs we stopped at what is a much better, but still a compromised setup. This is afterall a street car and not a race car. So getting 'perfect' corner weights may not be possible.


Tire pressures were also adjusted from the factory settings of 36F/44R to 32F/40R. The common wisdom is that this is a better setup reducing some understeer, improving grip and at the same time giving a better ride around town.

We'll see how it does and report back on Monday. To the track!

Thursday, June 19, 2008

996 Project Dyno Session #1

Wednesday, June 18, 2008

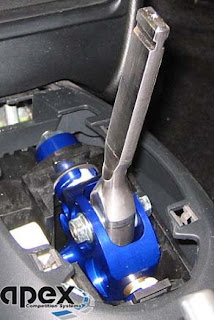
B&M Short Shifter Installed

You think the shifting of your 996 is already as good as sports cars get? Think again! We just installed a B&M shifter into ACS Project 996 and wow, what a difference. The shifting has gone from excellent to 'PERFECT'.

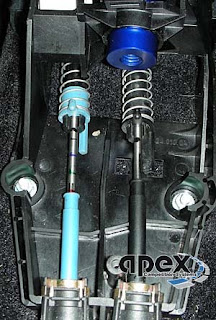
The shifter is supplied with everything needed to install plus the included B&M instruction manual which is excellent. Plenty of detailed photos and it covers every step of the process very well. The shifter takes about 1 hour to install with basic hand tools.

Once on and adjusted, the driving feel is much improved. 1-2, 3-4 and 5-6 shifts are now made with a very quick and decisive "snik, snik" that you'd expect from a racing shifter. The gate width between 2-3, 4-5 shifts is reduced but the "feel" for these gears is actually improved. The shifting effort is not noticibly increased and it remains easy to throw into the gears. The B&M shifter reduces much of the 'play' giving it a nice firm feel.


One word of advice. While it is outlined in the instructions, it is very important that you mark the location of the cable shafts prior to disassembly. Failure to do so can make adjustment once assembled much more time consuming. We found that even a 1 or 2mm change in adjustment at the cable attachment points created a difference you could really feel in where and how far the shifter engaged.

Monday, June 16, 2008

BMC Panel Filter


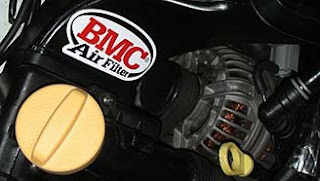
We had a BMC panel filter laying around unused so we popped it in this weekend. This filter has a very nice soft silicone type seal all around the edge. This filter appears to be very similar to the excellent "Green" Brand filters we recommend. Great fit, quality materials, recommended.


Later we will be installing the EVOMS cold air intake. The EVOMS intake is a true ducted cold air intake with a low restriction cone filter feeding a radiused intake trumpet attached to the throttle body hose. The Grand-Am Cup teams use the EVOMS intake. We'll be dyno'ing it later.