Apex Competition's 996 Carrera 2 Project Car

So what's this all about? It's about the impressive Porsche GT3 Cup cars that we can't drive everyday... so why not take an affordable 996 C2 and modify it to arrive at a semi-comfortable yet formidable weekend club sport toy... One that can still be driven to and from the circuit and even everyday!

Saturday, September 20, 2008

Spacer & Stud Kit Install

While we had already installed slightly wider Carrera 2 wheels on our 996, they still did not 'fill' fenders completly. Maximizing the track of the vehicle is almost always a benefit to handling plus a wide stance just looks better and is in keeping with our project's purpose of making our 996 as much like a GT3 as possible.
Keep in mind that the following recomendations are for the Carrera 2 wheels (or similar) shown below and for the original 996 twist wheels which are slightly narrower. Any other wheels such as GT3 or aftermarket (non-factory offset) wheels may need their own analysis to determine proper spacer & stud selection.

As an authorized H&R dealer, we have a full selection of wheel spacers from 7 to 45mm available to us. The goal was to widen the track to the width of a GT3 keeping the various tires sizes and wheel width options in mind.


We started with a 14mm H&R spacer which we trial fitted to both the front and the rear. Some have used a narrower 7mm spacer at the front of the 996 so we were hesitent to immediately put 14mm spacers on all 4 corners. However after testing the 14mm at all for corners and checking the clearances we determined this was well within fender. This also maintained the factory's original front to rear track difference and brought the tire out to about the same position it would be had we installed a set of wider and deeper offset GT3 wheels.

In the rear we determined that a slightly wider spacer could be used due to the additional fender clearance. So for our final setup we selected a 14mm spacer for the front and a 15mm spacer for the rear. An 18mm spacer could also have been used at the rear however we made a concession to the width as this car would also be regularly street driven. The concern was that 18mm would cause dirt and water coming off the wheel to splash down the side of the bodywork.

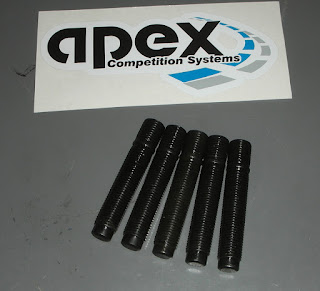
Any spacer for the Porsche 996 is going to require either longer wheel bolts or a conversion to a a stud & nut kit such as our "Track Stud" conversion kits. The first thing you need to do is determine what type of wheel nuts you will need. This will be determined by the type of wheels you have. If you have factory Porsche wheels you will need spherical seat wheel nuts such as those found on earlier Porsches. However if you have aftermarket wheels they often use a conical seat and you will therefore need a wheel nut with a matching 60 degree cone seat.

If you change your wheels often like we do then on of our ACS "Track Stud" wheel stud kits will make your lfe much easier.  In addition to the extra strength affored you by these kits, repeatedly mounting a heavy wheel/tire combo become a "peice of cake".   No more balancing the wheel on your foot while you struggle to thread that first wheel bolt in.

Monday, September 15, 2008

Sway Bars

In order to dial out some of the understeer of our 996 an adjustable H&R rear sway bar was installed.  We left the original front bar alone as a larger front bar would just bring more understeer back into the equation.

Removal of the original rear bar is simple and straight forward on the 996.  Simply unbolt the inner pivot mounts and then disconnect the end links.  Installation of the new H&R bar is simply the reverse.

The H&R rear bar will give us the adjustability needed to help dial in the supension the allow more neutral handling.  Unfortunately the H&R bar is thicker, solid and therefore heavy.  The last thing we want is more weight in the rear of a 911.  So eventually we will be locating a set of factory GT3 hollow sway bars. They are adjustable front and rear and very light.


Sunday, September 7, 2008

GT3 Brake Duct Spoilers

A quick, easy & inexpensive upgrade. The front brake ducts off a 996 GT3.


The 996 GT3 brake ducts have been altered to improve ventilation and therefore brake cooling. They are similar in size to the original 996 stock ducts, but these have more aggressive grooves to direct air more effectively to the brakes. There is an even more aggressive duct available from the 997 GT3 which also snaps right onto the 996 control arms. But this is the type (996) we are installing because it's what we have :)

Tuesday, September 2, 2008

GT3 Aero Kit Installation

The most obvious change in the transformation from a standard Carrera 2 to a GT3 look-a-like is without doubt the Mk1 Aerokit. The deep spoiler, side skirts and conspicuous rear wing totatally transform the look of the 996.

Below are a series of photos showing the progress. All work was done in house.

The mk1 Aerokit body components are made from polyurethane while the rear wing is made from what appears to be a glass fiber composite. This is preferable for two reasons. One is that curbs and other cars wont destroy the parts on contact. And the other reason is we wanted to make sure the car was only fitted with original equipment Porsche parts. The mk1 Aero kit was an option for the early 996 C2.

First, the slick polyurethane components were scuffed up with scotch brite to make sure the paint would adhear. Then we used a special sticky bonding agent called a "tie coat', that was sprayed on to make sure the paint would really bond to the flexible poly parts.

The side skirts were already primed and the tie coat acted as a primer, so there was no need for a special primer coat. We added a flex agent to the Glacier White paint so that it would not crack or flake should we ever come in contact with anything after installation. The base coat was laid on thin, allowed to "flash dry" for a few hours, then lightly sanded and the the final 2 base coats were added to give a thick flexible coat of Glacier White. These were allowed to dry overnight and the following day a liberal application of clear coat was applied. This provided the final protective barrier and would also allow for a durable high gloss shine.

Installation of the side skirts is extremely simple. The old plastic stone guards are removed from the bottom of the rear rockers. The new side skirts are then fastened with Porsche body clips to the underside of the rocker panels and by plastic "rivets" to inside edges of the front and rear fender openings. Afterwards the backing tape is peeled off the inside of the side skirt which allows them to be bonded to the car all along the skirt's upper length.


Fastening the front bumper to the car is a bit more involved than the side skirts but is still definately within reach of a 'garage mechanic' should you be thinking of attempting this yourself. First the side lights and head lights are removed. Then a number of self taping screws are removed all around the periphery of the original bumper. A few small bolts along the top where the hood lays and the old bumper should literally fall off the car.
Assembly of the new GT3 bumper cover is the reverse of removable with one exception. No two parts are ever the same. Especially when working with a 10 year old car. So while the new bumper cover should theoretically just slide into place, quite a bit of adjusting and and a tiny bit of trimming were required to get it to lay in place where we wanted it. All in all however , not a very difficult job.

The final result... a 996 Carrera C2 tat looks lower, more aggressive and newer. The downside is that the car now looks unbalanced. Aero treatments to the front and sides now are really asking for that Aerokit rear wing!